


Spring Wood Blocks Decoration DIY
- Kristin Mailhiot
- Feb 19, 2025
- 2 min read


Supplies Necessary (I do not receive product ad revenue. However, I will recommend specific brands or vendors to make it easier for you to find quality/available supplies.)
6 - 2" x 2" wood blocks (Dollar Tree)
decorative scrapbook paper (I chose 6 different patterns/solids)
foam brush
wood stain
burlap (enough to cut 6 squares that are 2'"x 2")
2" unfinished wood letters (S-P-R-I-N-G letters)
pencil
scissors
white glue
small wood shapes
acrylic paint
paint brush
Instructions -
Start by protecting your surfaces with waxed paper, parchment paper, etc before starting! I even wear disposable gloves when I use the wood stain.
Use the foam brush to apply wood stain to all 6 sides of each of the 6 wood blocks. I recommend applying the stain to a few sides of the block at a time, leaving dry time before moving on. That will keep the mess to a minimum and will allow the stain to dry neatly.

Staining the wood blocks. Select the decorative papers for the letters for the blocks. Match the papers to your decor or whatever makes you happy! Mix and match or go will all the same color/pattern.
Turn the decorative papers and letters over so their back sides are facing up. Then trace each letter on the back side of the decorative paper you chose for that letter (see photo).

Trace the letters on the decorative papers. Use the scissors to carefully cut out each letter you traced on the decorative papers.

Trace the letters backwards on the back side of the decorative paper. Attach the decorative papers to the wood letters using the white glue. Let them dry.

Glue the cut out paper letters to the corresponding wood letters. Paint the tiny unfinished wood shapes and let them dry too.

Paint the wood shapes with acrylic paint. Cut the burlap into squares that measure 5cm x 5cm. Sorry for the switch to cm, but it is the perfect measurement for the blocks.

Cute 6 burlap squares measuring 5cm x 5cm. Pull the outer thread from each side of the burlap squares to create a fringe around the edges.

Fringe each edge of the burlap squares. Glue one burlap square to each wood block using the white glue. Set aside to dry.

Glue one burlap square to each wood block Use the white glue to attach one letter to each wood block on top of the burlap that has dried. The decorative paper should be facing out!
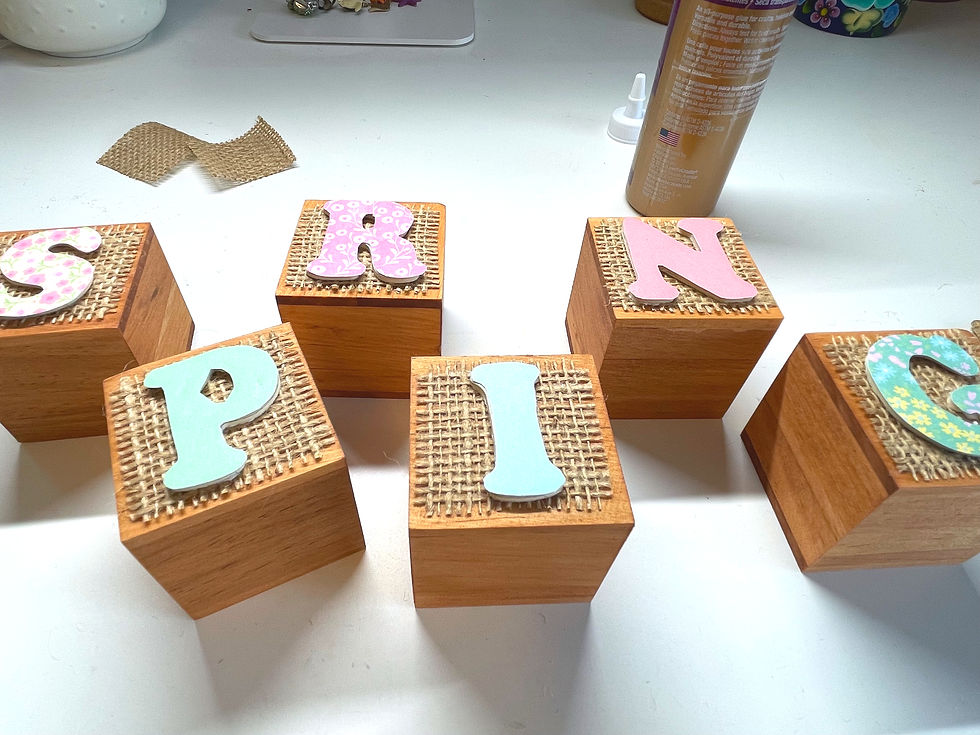
Glue the letters on the burlap. Once the wood blocks and letters have dried, glue the tiny wood shapes to the blocks where you would like to add dimension to your design. Set aside to dry.

Finsihed Spring Blocks Display your Spring Blocks and celebrate Spring! Don't forget to share photos of your own creations!


Comments